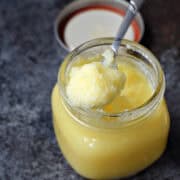
Clarified Butter
Learn how to make clarified butter with this easy step-by-step guide. It is a simple process of removing milk solids from butter to create a versatile ingredient to use in baking and sautéing.
Servings: 12 Servings
Calories: 271kcal
Equipment
- Saucepan
Ingredients
- 1 pound unsalted butter 4 sticks - preferably European butter
Instructions
- Place the butter in a saucepan or a heavy-bottomed saucepan over very low heat. Allow the butter to melt slowly without stirring.
- As the butter melts, white foam will begin to form on the surface of the butter. Use a spoon or a fine mesh skimmer to skim off this foam. This foam consists of the milk solids and water that you want to remove, leaving the clarified butter in the pan.
- Carefully pour the clear butterfat (the clarified butter) into a heatproof container, leaving behind the milk solids at the bottom of the pot. You can strain the butterfat through a fine mesh strainer with several layers of cheesecloth or coffee filter to remove any remaining solids.
- Discard the cheesecloth when finished. Allow the clarified butter to cool before storing.
- Once clarified, the butterfat can be stored in an airtight container at room temperature, in a cool dark place for several months. Or you can store in the refrigerator for up to one year.
- Clarified butter stored at room temperature will remain creamy. Clarified butter stored in the refrigerator will become a bit stiff.
Notes
- You can clarify any amount of butter, whether it’s a small or large batch. In fact, the process may be easier with larger amounts as it can be more difficult to skim off the foam from smaller quantities
- Purchase a cheesecloth with a fine/tight mesh if possible. I used double layers, but the weave was still a bit too wide.
- Since clarified butter consists purely of butterfat with the milk solids and water removed, it meets the criteria of being dairy-free and Whole30 compliant.
- European butter contains a higher fat, and lower moisture content than regular butter. Kerrygold and Plugra are two brands that are becoming easier to find in your local grocery store.
Nutrition
Calories: 271kcal | Carbohydrates: 1g | Protein: 1g | Fat: 31g | Saturated Fat: 19g | Cholesterol: 81mg | Sodium: 4mg | Potassium: 9mg | Sugar: 1g | Vitamin A: 945IU | Calcium: 9mg