Instant Pot Faux-tisserie Chicken
This post may contain affiliate links. As an Amazon Associate I earn from qualifying purchases. For more information, please visit my disclosure page.
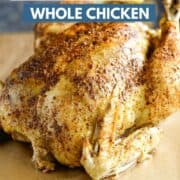
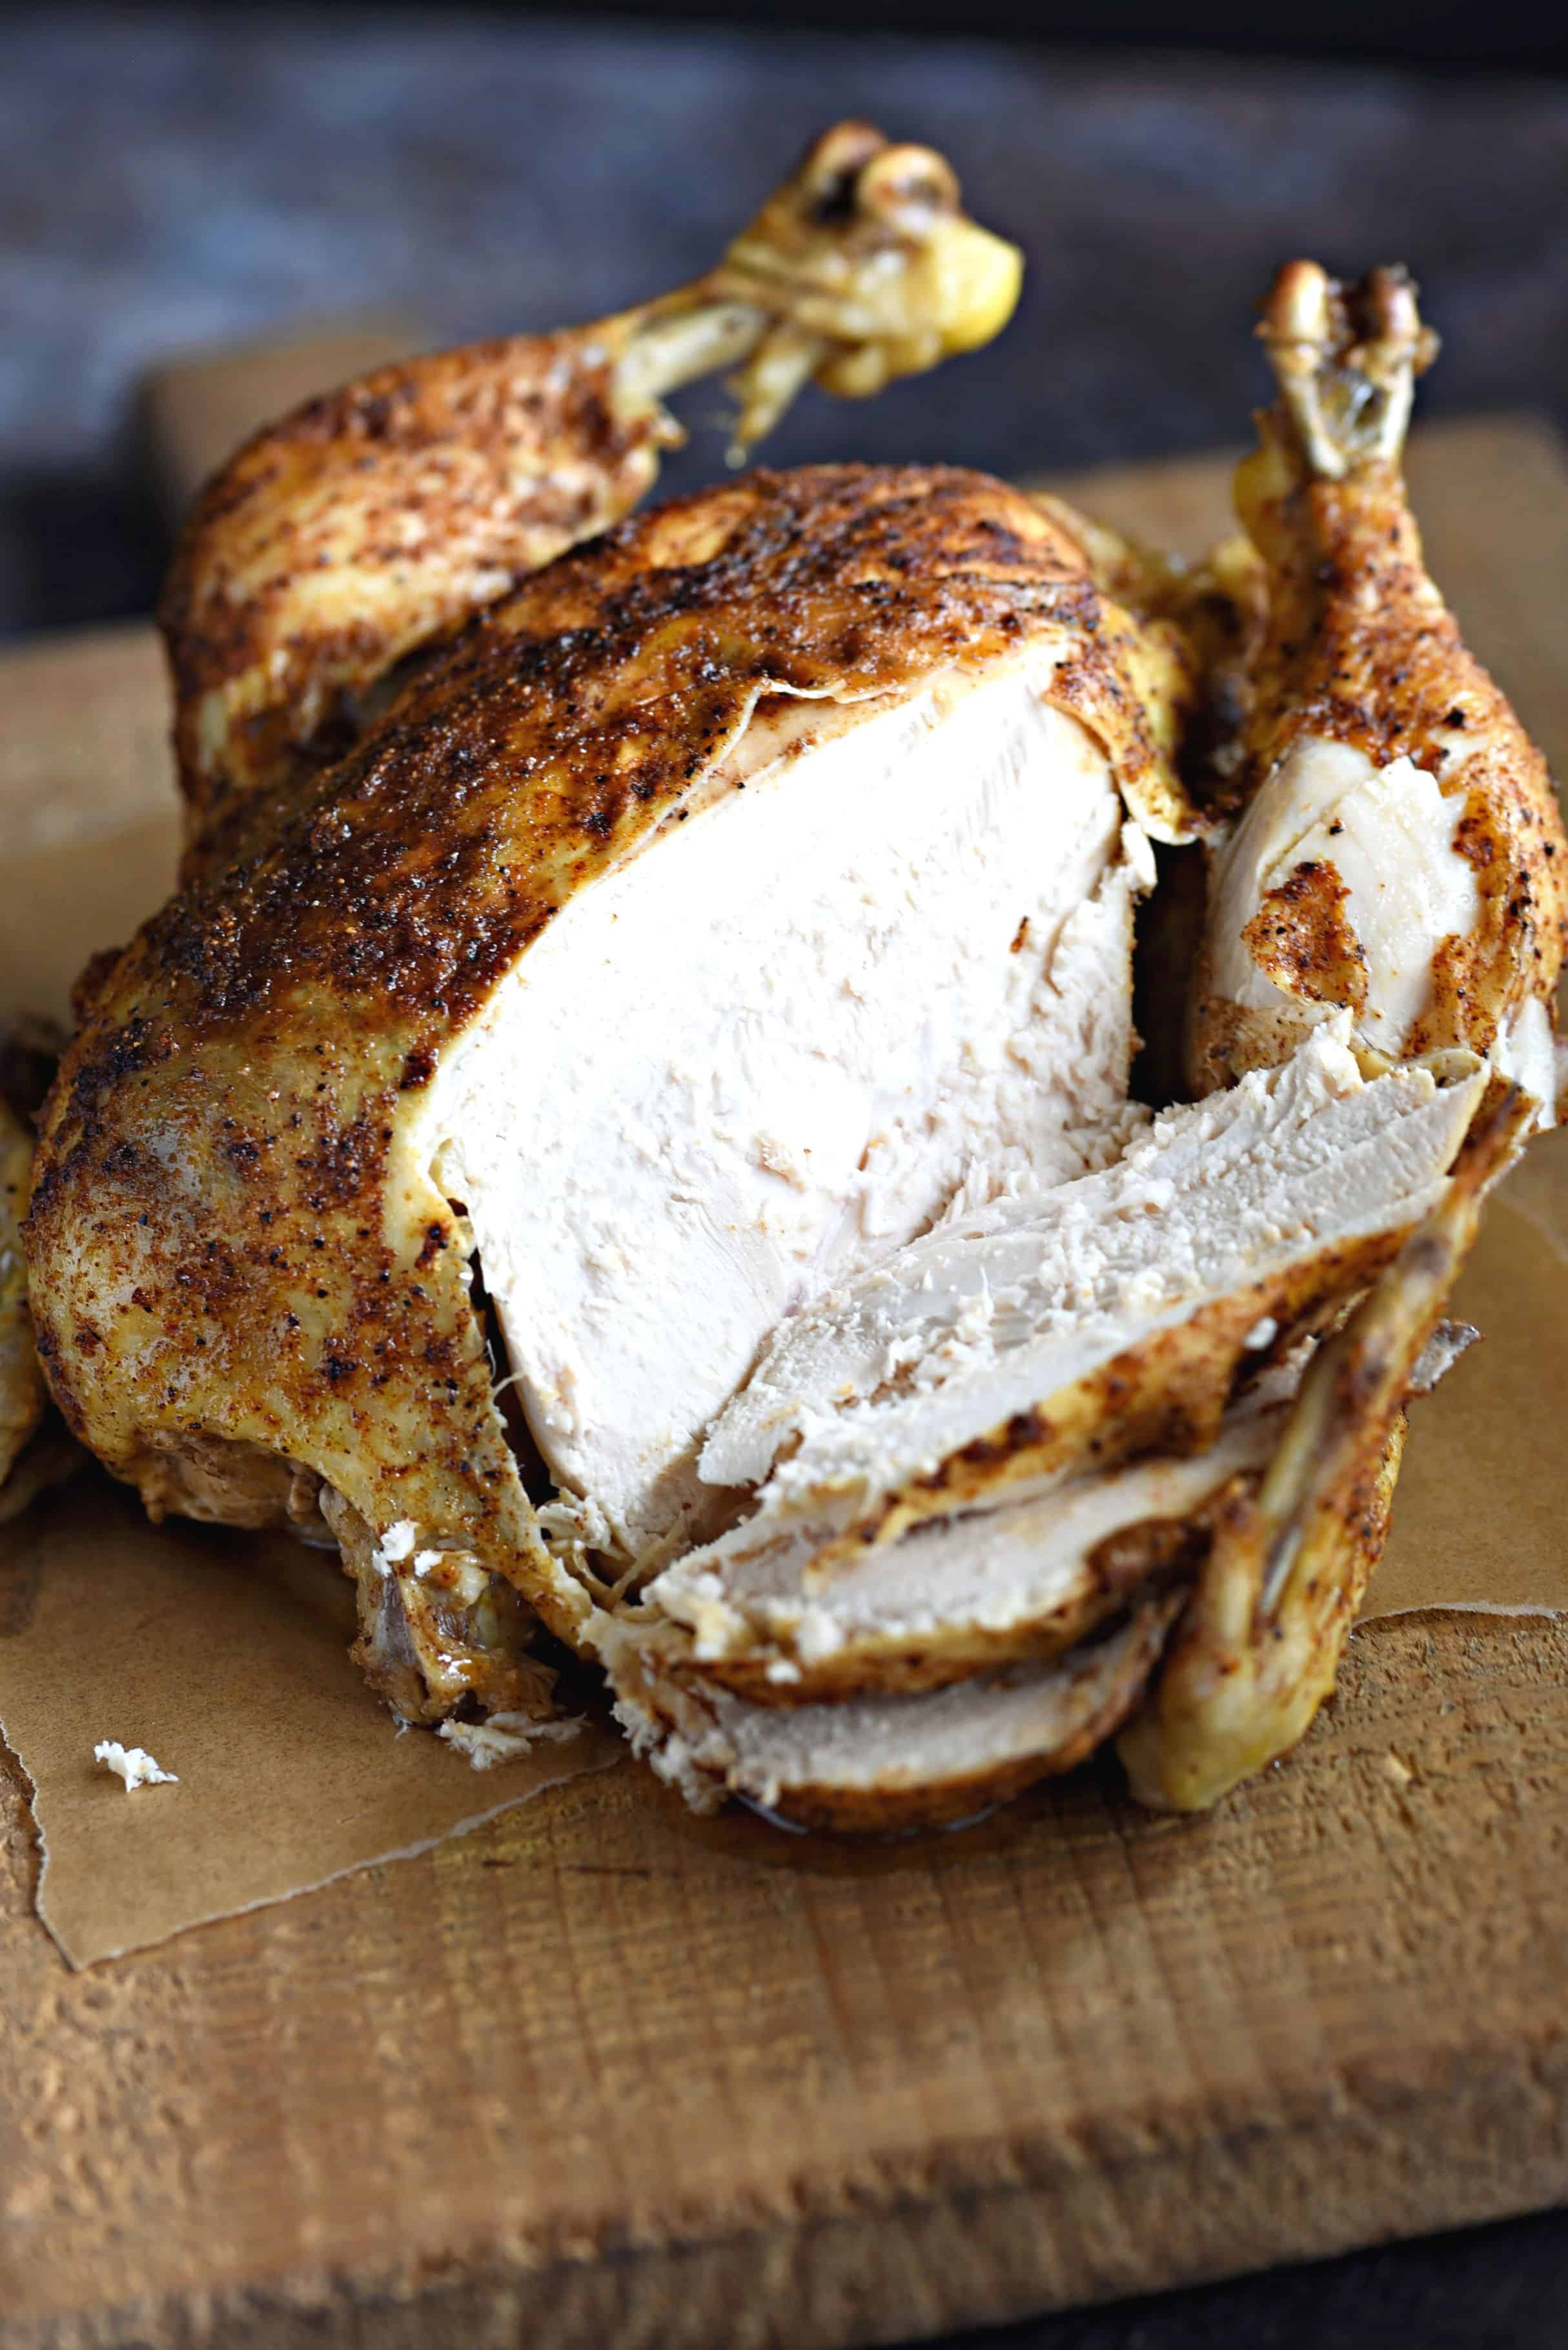
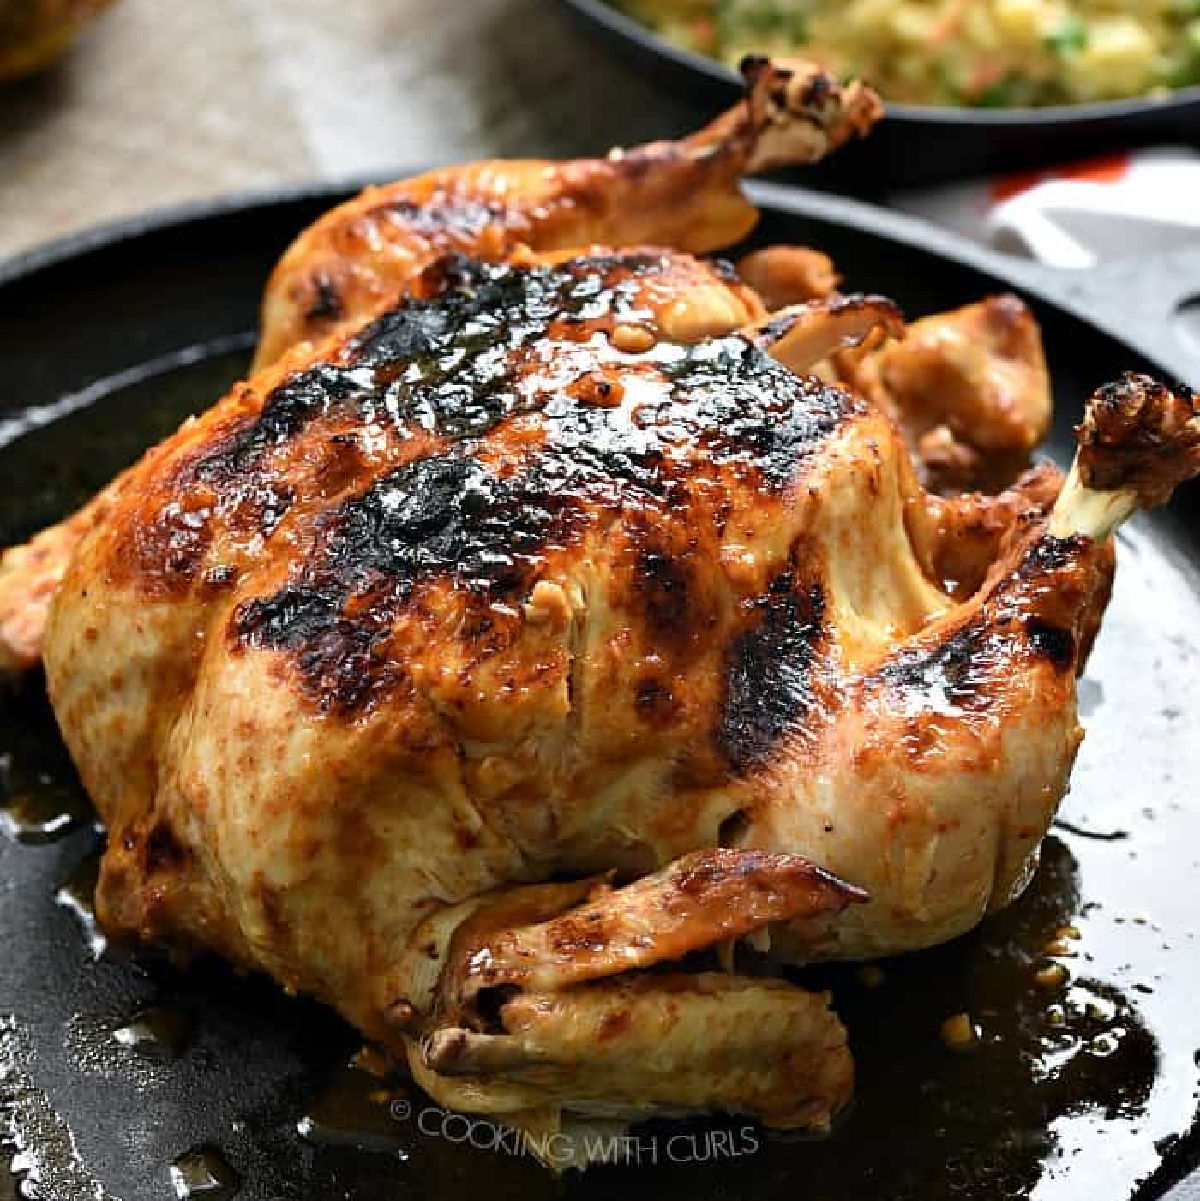
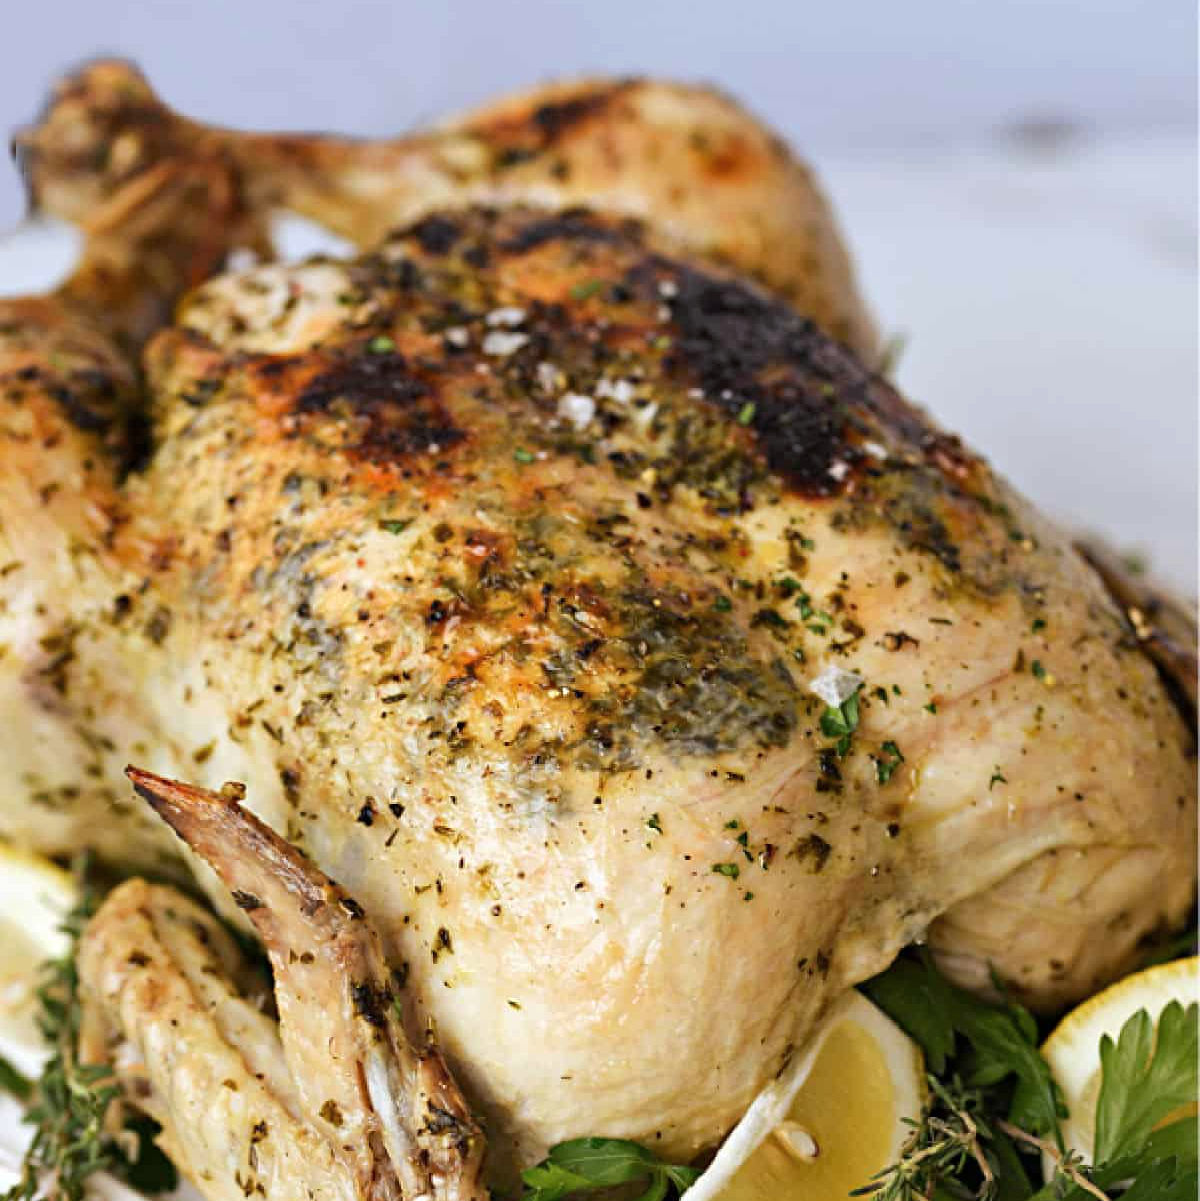
Weeknight meals just got easier with this tender and juicy Instant Pot Faux-tisserie style Whole Chicken recipe. This is the best way to cook this incredibly easy chicken that is perfect for whole30, paleo, and keto lifestyles!
For even more delicious pressure cooker recipes, check out the Instant Pot Recipes page.
Do you ever find yourself at the grocery store buying a week’s worth of food, then reach for a rotisserie chicken because you no long have the energy to go home and cook what you just purchased? I admit it, I am guilty. But have you ever looked at the ingredients label on that chicken?
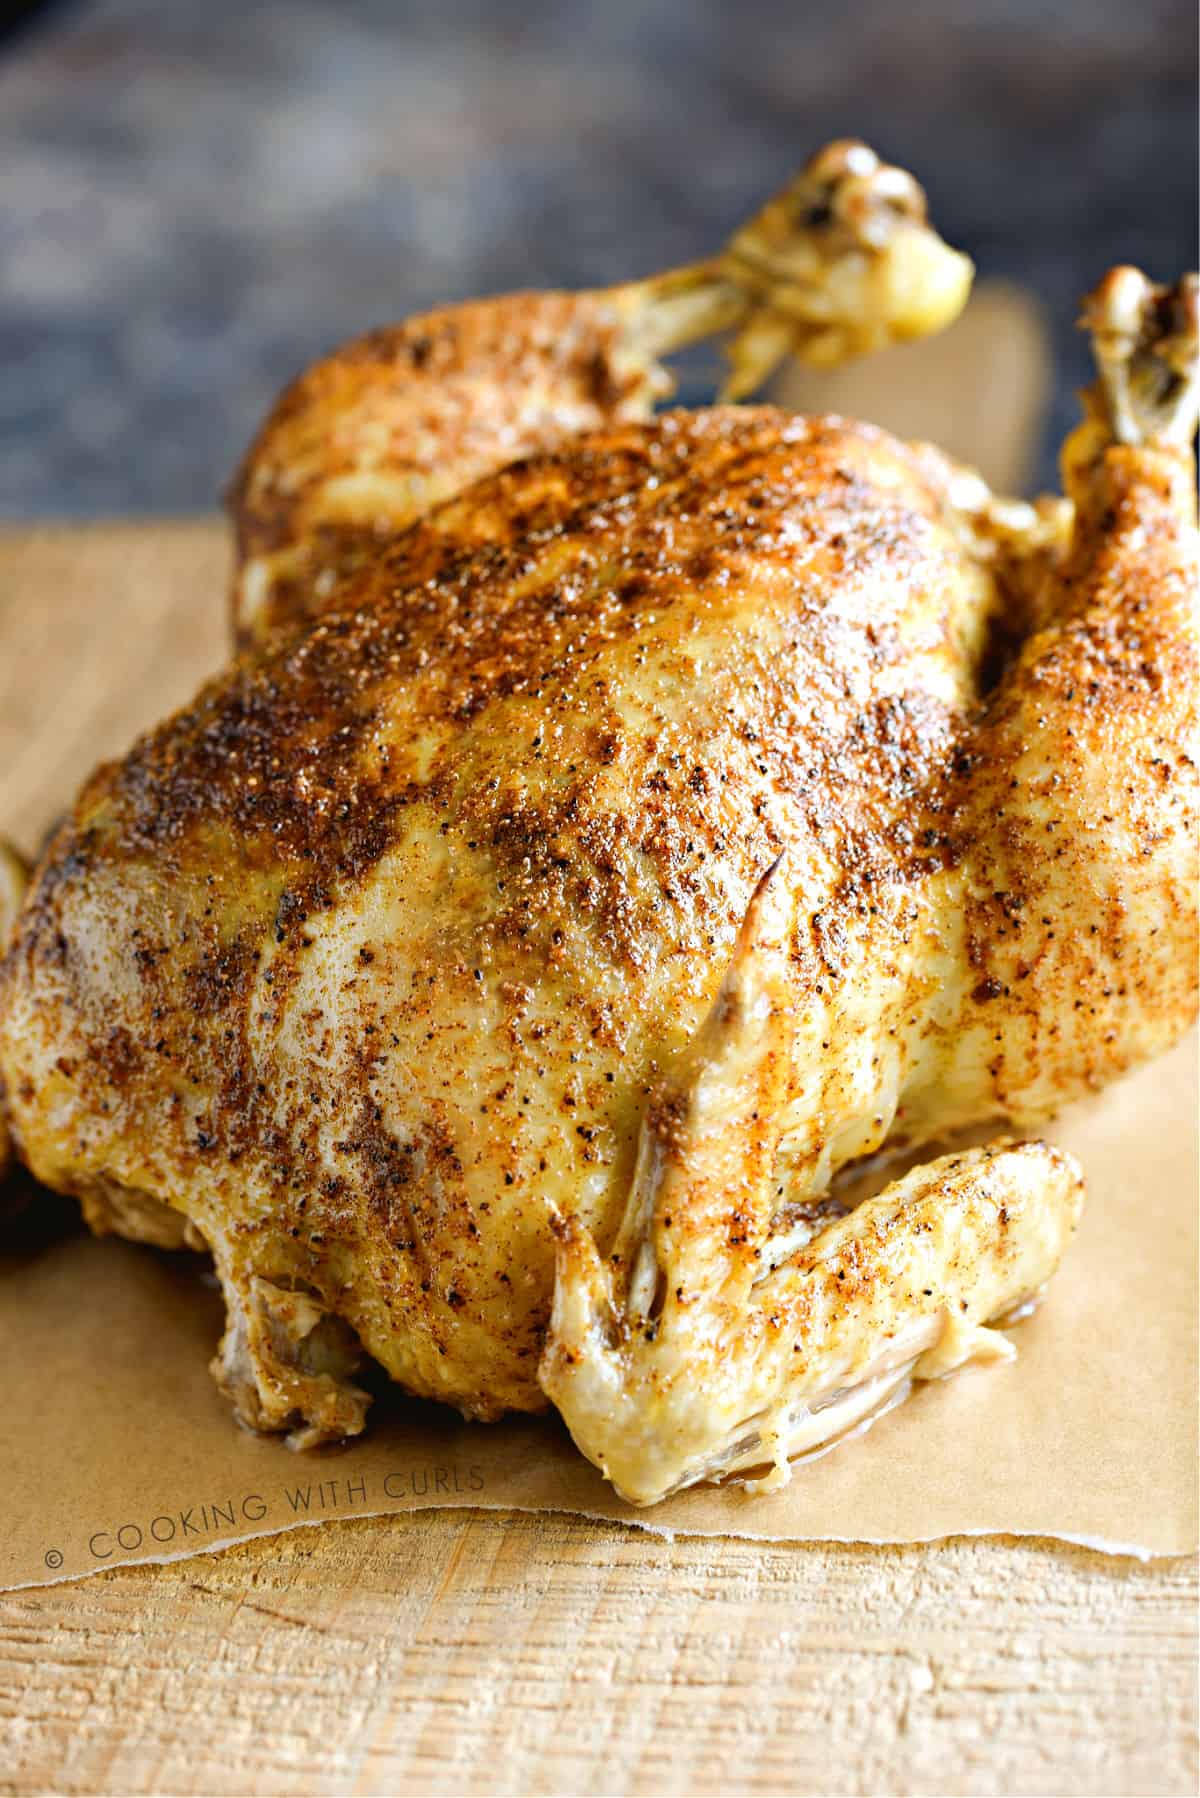
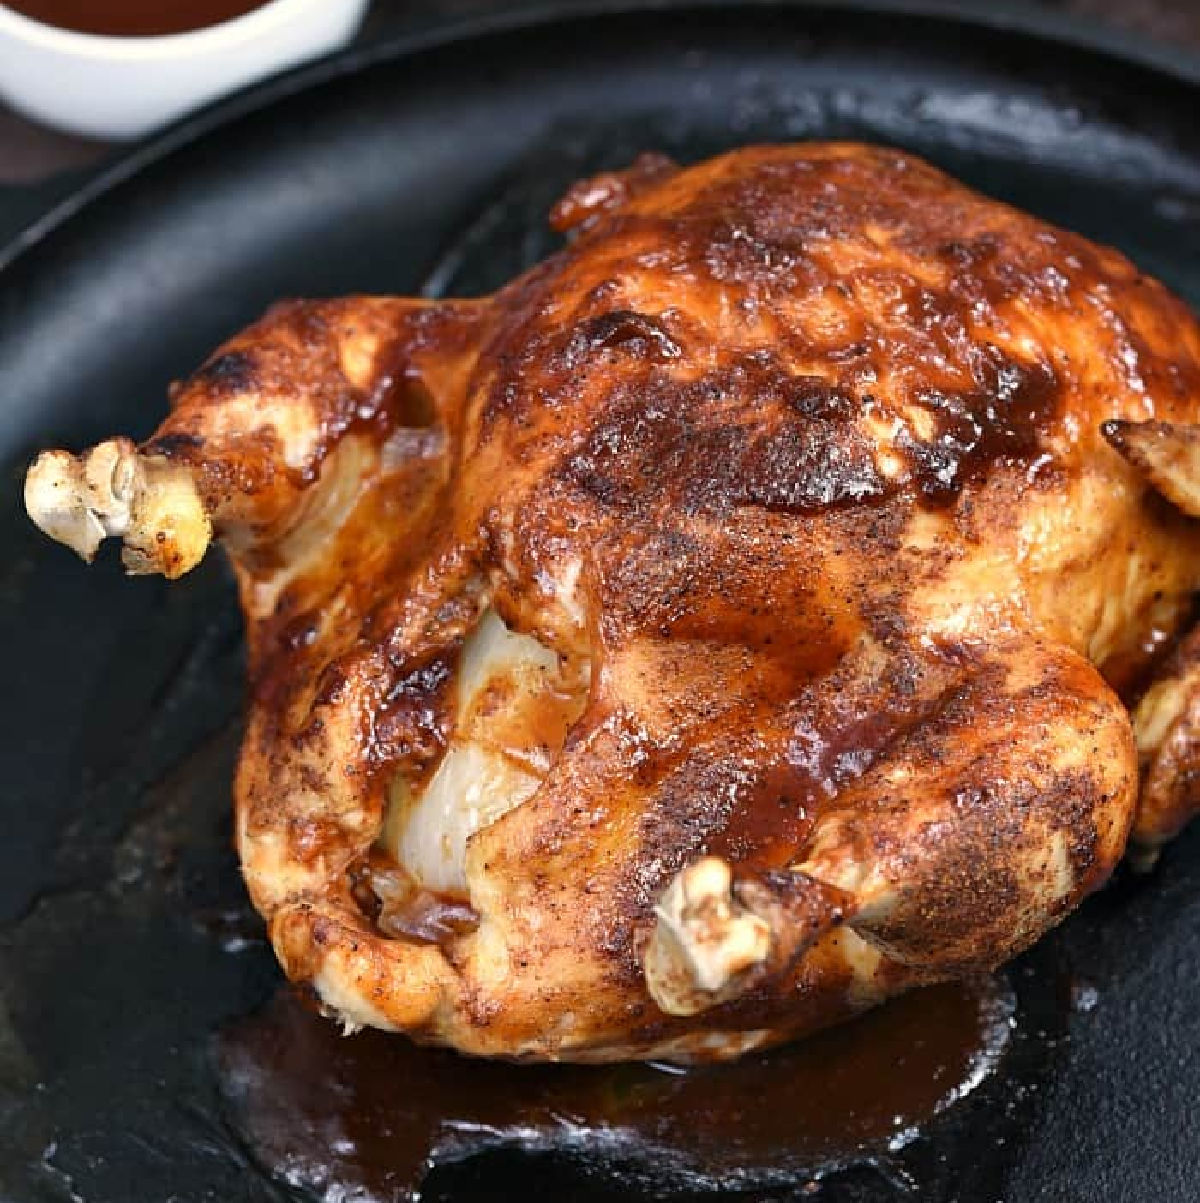
This Instant Pot Faux-tisserie Chicken is tender and juicy just like the rotisserie chickens at the store, but it is not injected with brown sugar or any crazy sounding ingredients.
There is no caramel coloring to be found, just chicken, butter or olive oil, fresh onions, garlic, and seasonings. That’s it!! Oh, and it also hasn’t been sitting under warmers for hours.
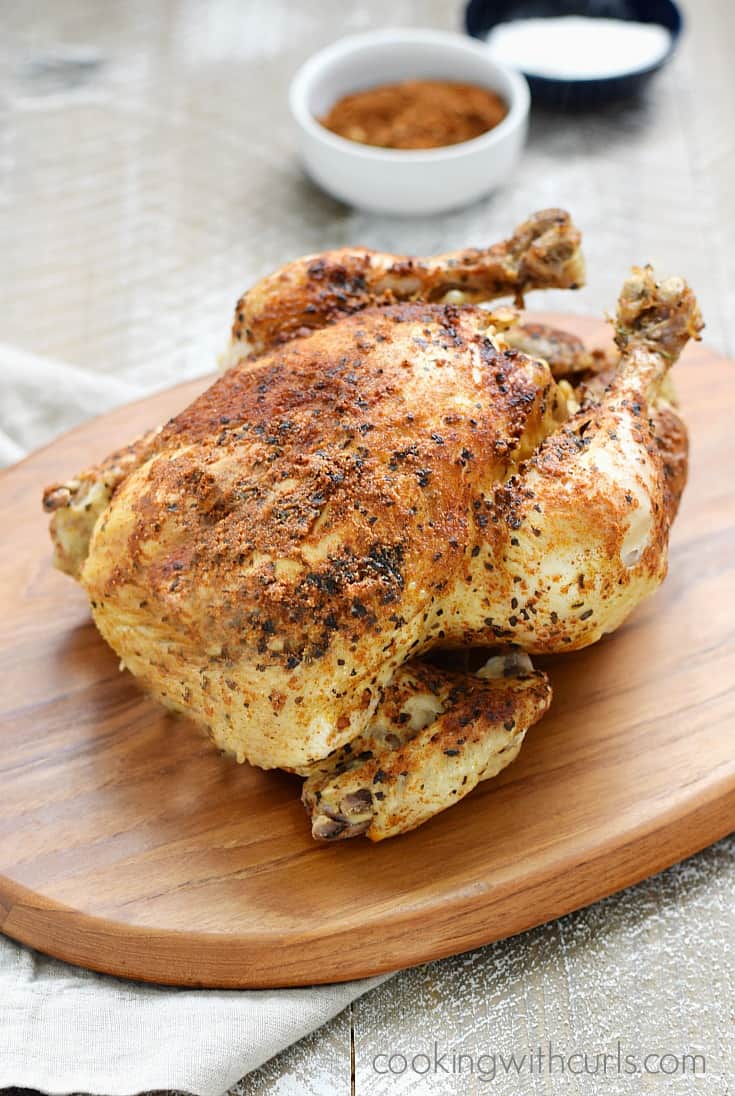
Update 9/15/2020: I have updated this post to make some clarifications and simplifications based on readers suggestions, and created all-new images to reflect these changes. We will no longer be searing the raw, whole chicken. Instead, we will broil it in the over after it has been cooked. This allows us to add seasoning under the skin for even more flavor and juicy chicken. Below is the original image so you know you that Pinterest sent you to the right place. 🙂
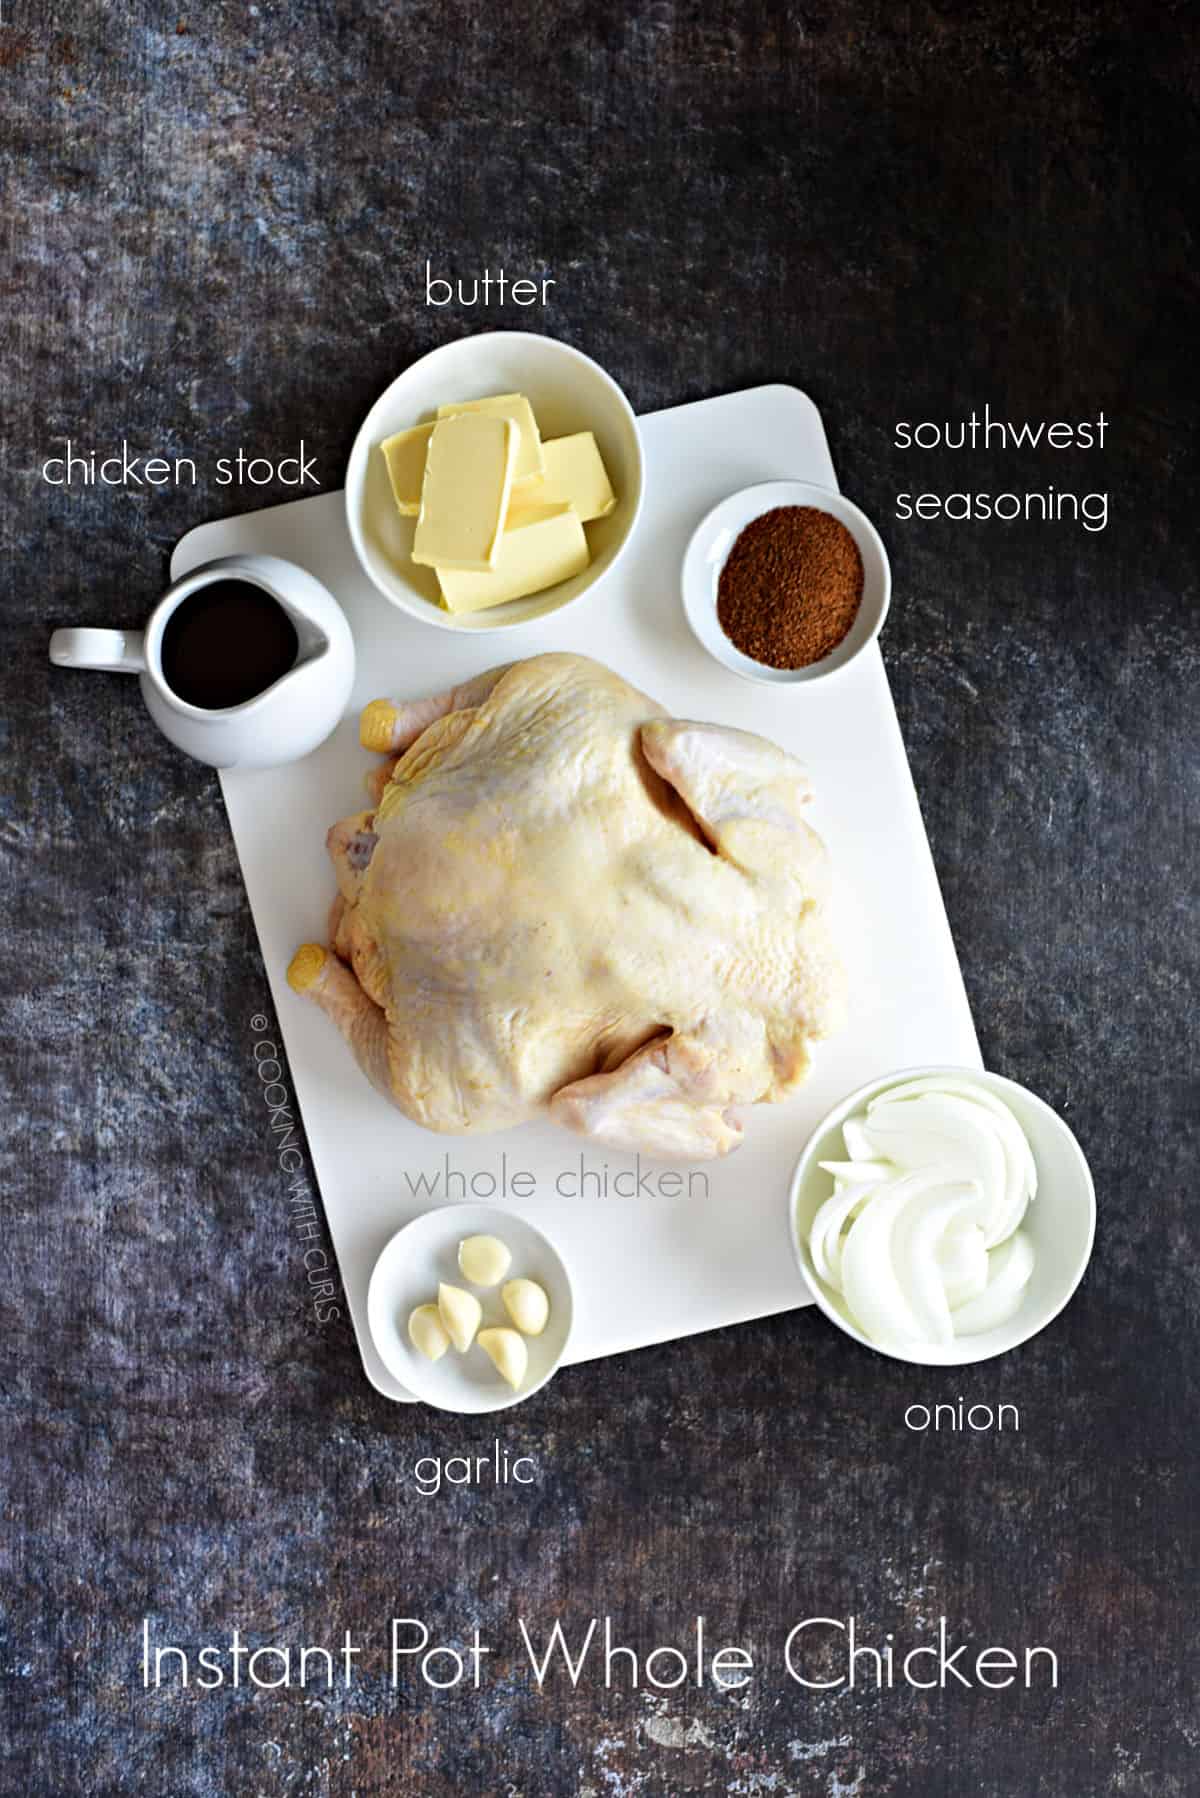
What you need for this recipe:
How to make Instant Pot Whole Chicken:
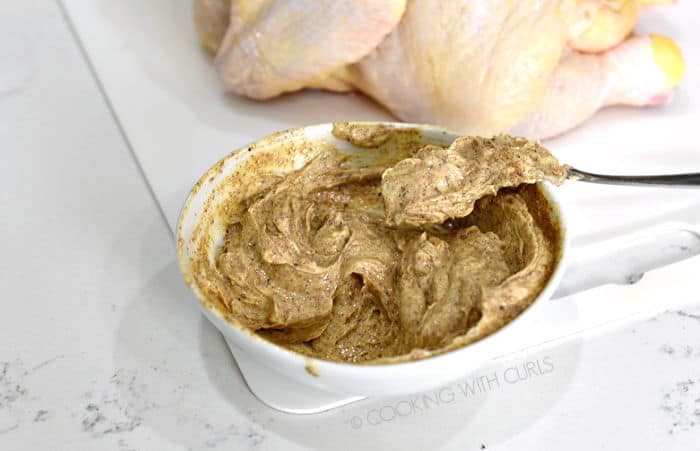
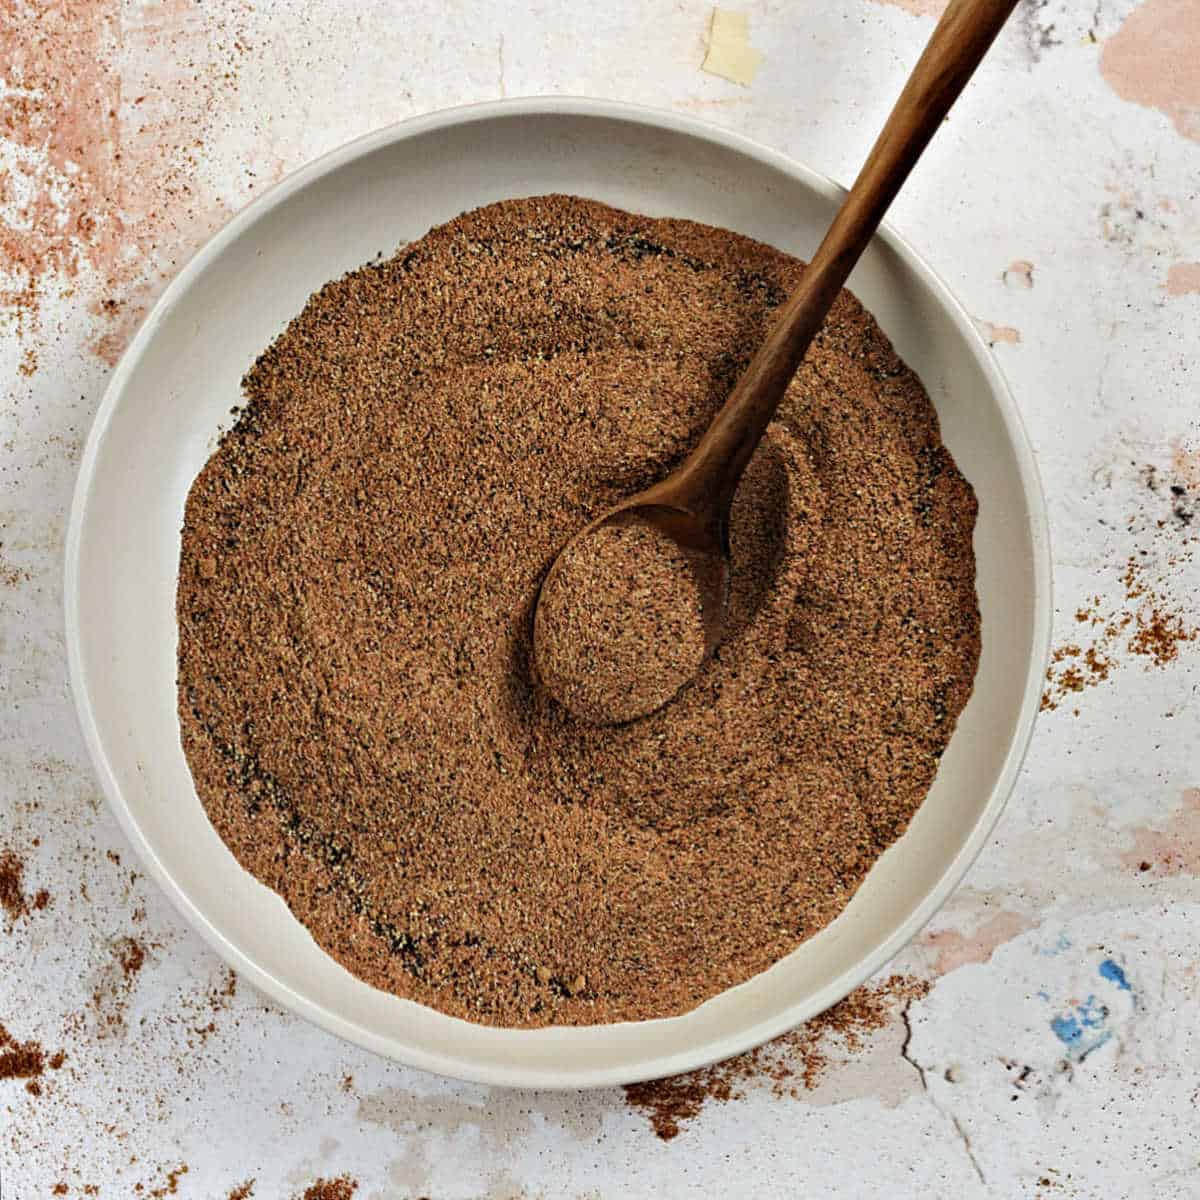
Mix the softened butter and seasonings together in a small bowl.
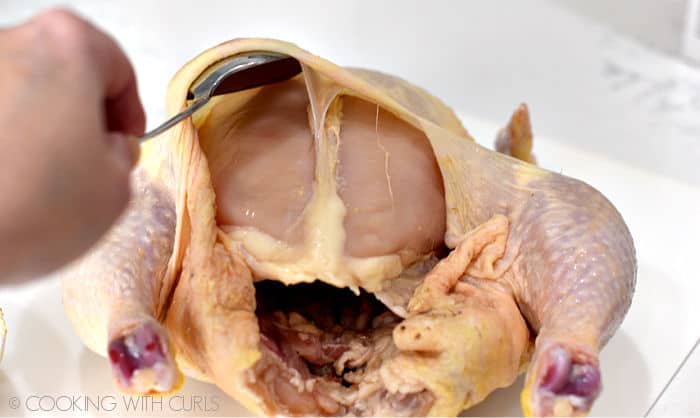
Slide your fingers between the skin and chicken breast to create a pocket. You can use gloves or carefully use a large spoon if you like.
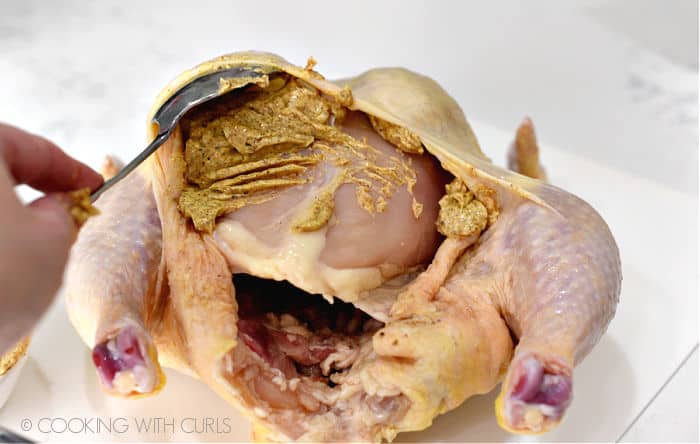
Place a handful of the butter mixture under the skin and rub it around to cover as much as you can.
Rub the remaining butter all over the chicken.
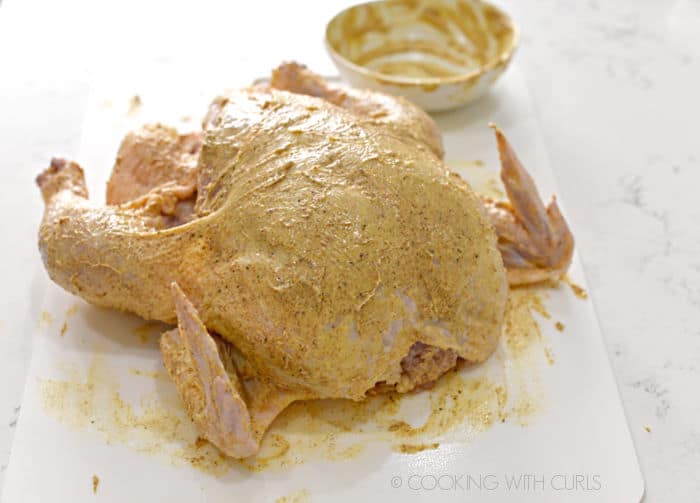
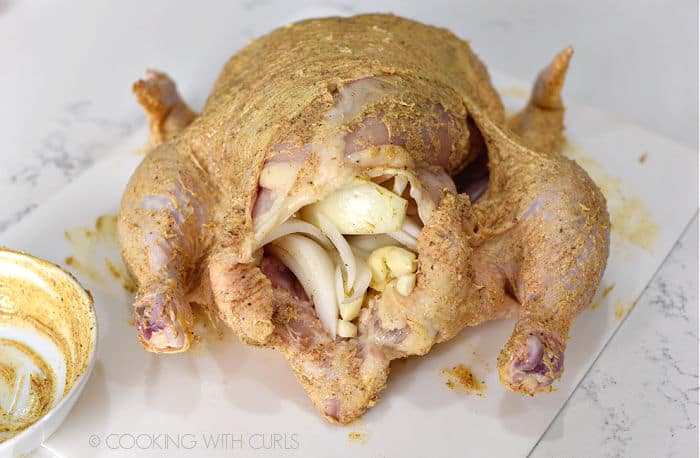
Place the onion wedges and garlic cloves inside the chicken.
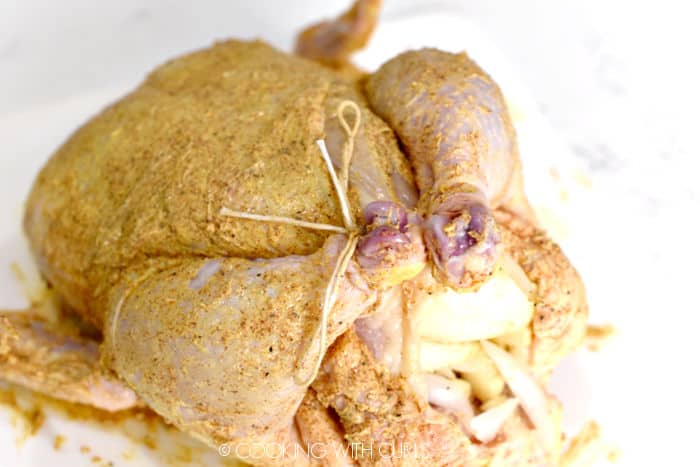
Use butcher’s twine to secure the legs.
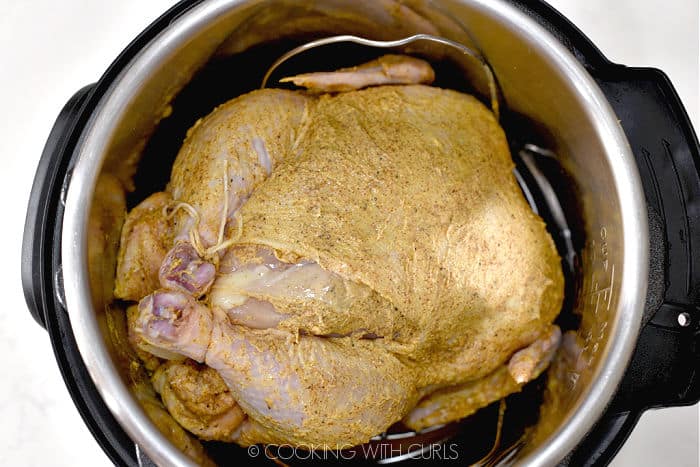
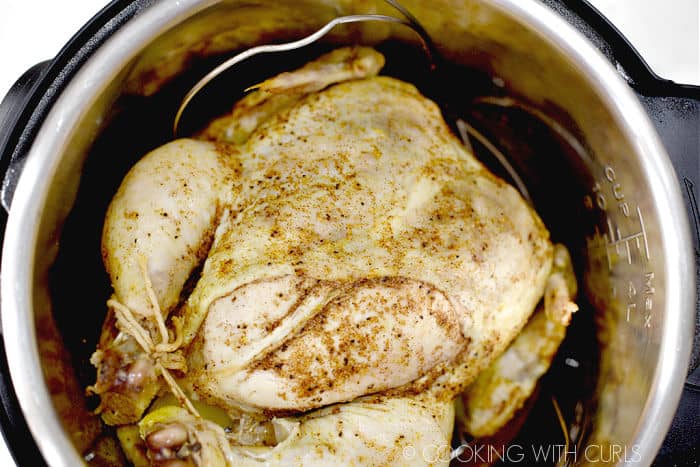
Place the trivet inside the liner of your pressure cooker. Pour in the chickens stock (or liquid of your choice), and place the chicken on top of the trivet.
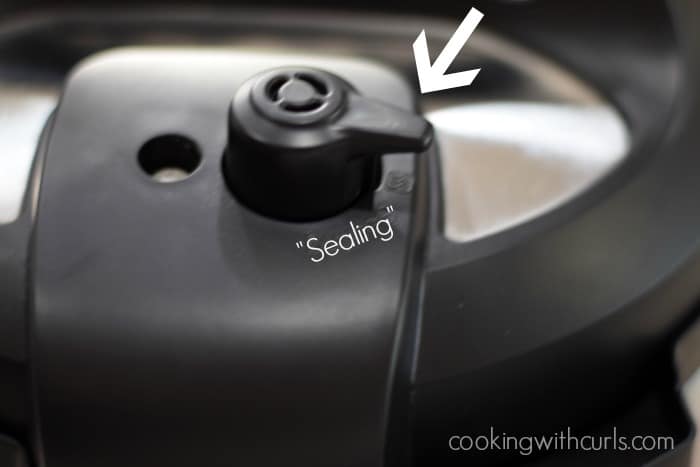
Make sure the lid is in the “Sealing” position, not “Venting”.
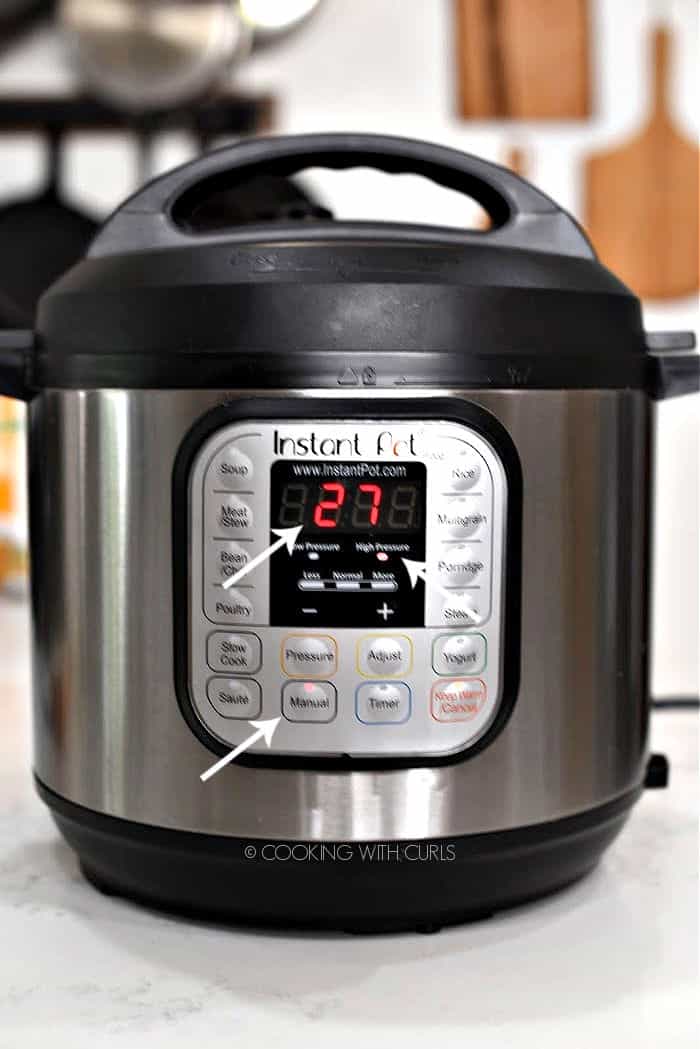
Secure the lid, press the Manual or Pressure Cook button and adjust the time with the + or – buttons to the length of minutes needed*, mine is 27 minutes on High pressure for a 4.5 pound chicken.
When the timer beeps, allow the pressure to release naturally for 15 minutes. If the lid will not open, quick release the remaining pressure and remove the chicken.
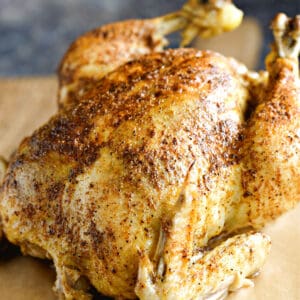
Carefully remove the chicken from the pressure cooker and place on a foil lined baking sheet and sprinkle with salt and pepper.
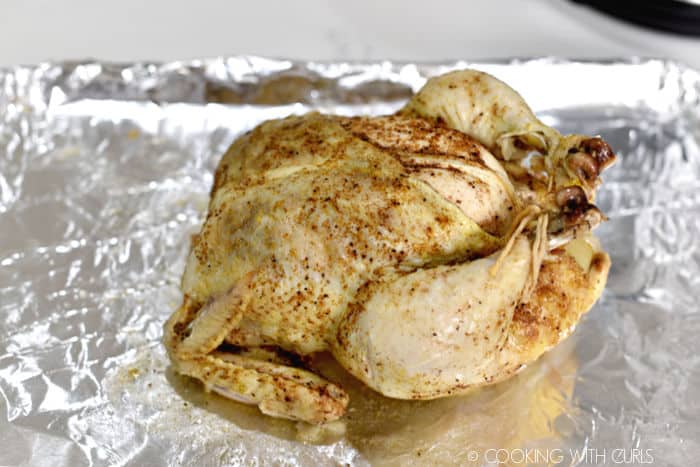
Place under the broiler for 4 to 5 minutes to brown the skin. Remove from oven and allow chicken to rest for 5 to 10 minutes before serving.
Reminder, sharpen your knife before using!!
To make a pan gravy:
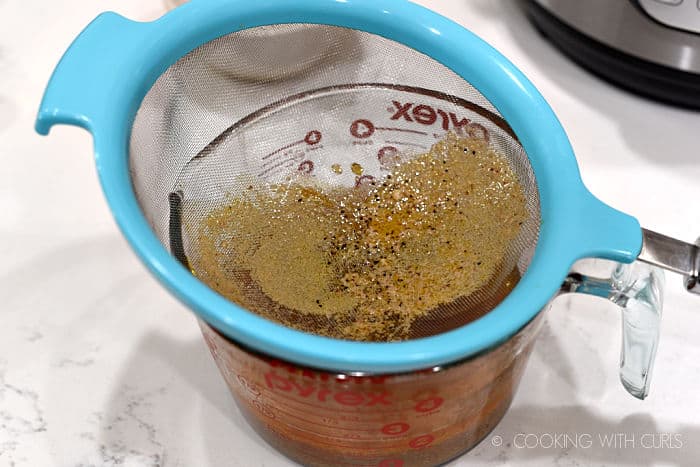
Press the cancel button. Lift the liner/pan out of the pressure cooker and pour the chicken stock through a strainer into a measuring cup.
Add additional stock to equal 2 cups. Place 4 tablespoons of the hot stock and 4 tablespoons of flour or cornstarch(arrowroot starch for Whole30/Paleo) into a small bowl. Whisk to combine.
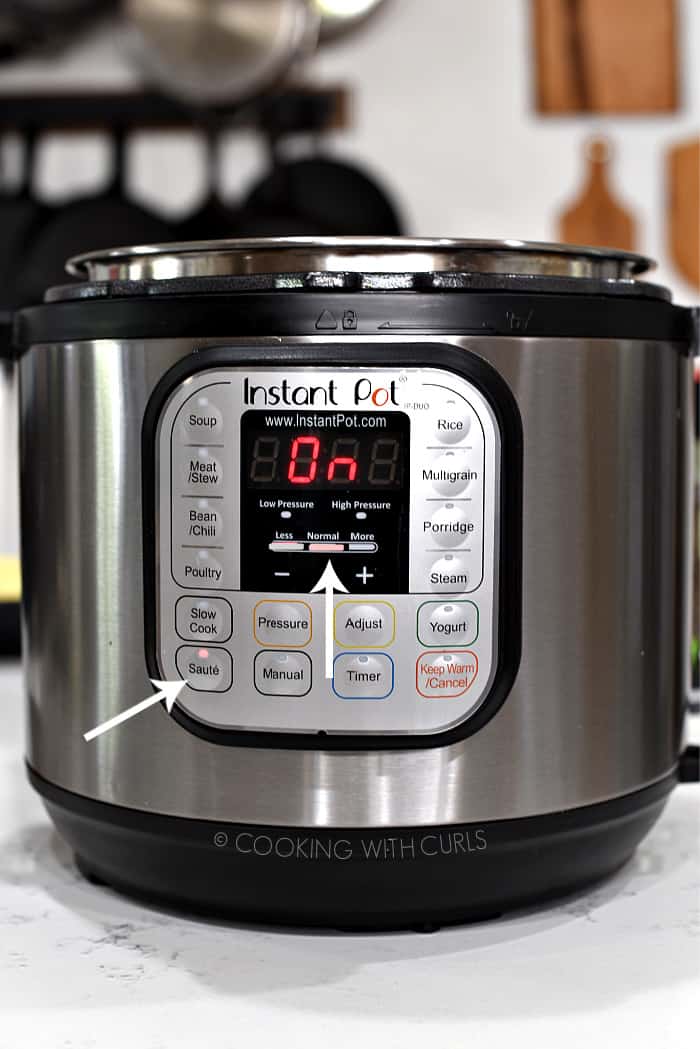
Pour the remaining stock back into the liner of the pressure cooker. Press the Saute button. Add the flour/stock mixture into the pan and whisk to combine.
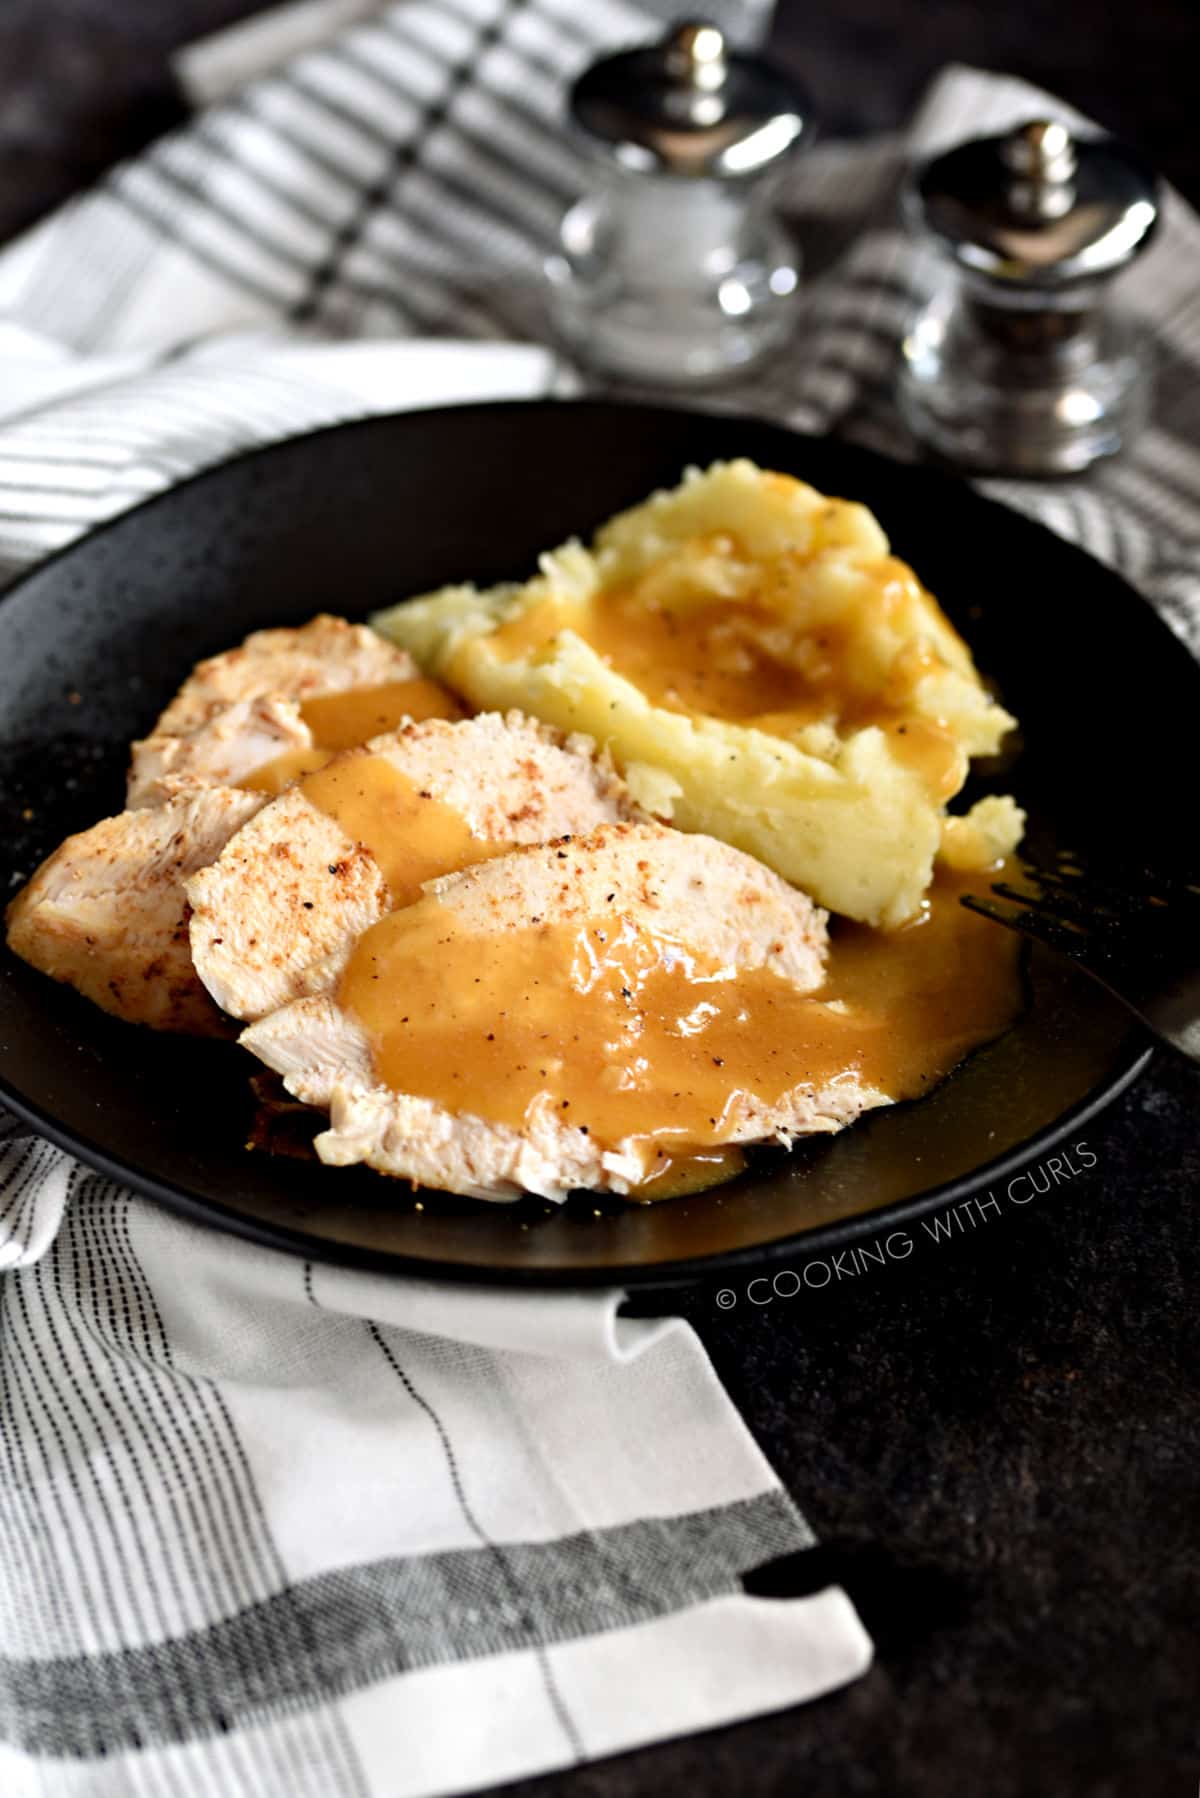
Heat until mixture starts to thicken. Serve with chicken and Instant Pot Mashed Potatoes.
Instant Pot Whole Chicken Cooking times
The general rule to cook a whole chicken is 6 minutes per pound with 15 minute natural pressure release.
- 3 pounds = 18 minutes with high pressure + 15 minutes natural release.
- 3.5 pounds = 21 minutes with high pressure + 15 minutes natural release.
- 4 pounds = 24 minutes with high pressure + 15 minutes natural release.
- 4.5 pounds = 27 minutes with high pressure + 15 minutes natural release.
- 5 pounds = 30 minutes with high pressure + 15 minutes natural release.
Recipe Notes & Tips
- Cooking time does not include the time it takes for the pressure cooker to reach pressure, this will add an additional 15 to 30 minutes.
- Each pressure cooker is different so times may vary depending on brand, temperature of chicken when you begin cooking, even the size of your pressure cooker can make a difference.
- I have included a scaled down Southwest Seasoning recipe, but any seasoning will work, garlic-lemon, paleo powder, etc.
- You do not have to use a trivet, but the bottom of your chicken will be soggy if you don’t.
- If your cooker is not coming to pressure, double to check that the lid is completely secured and it plays that little song when it’s closed.
Whole30 Instant Pot Whole Chicken Recipe
This recipe is Whole 30 and Paleo compliant, but you would never guess it. The chicken is still moist and full of flavor. Best of all, when you use your Instant Pot you can walk away and do other things until it’s ready.
Tools used to make this recipe
You can see the rest of my favorite kitchen tools and gadgets here in my Amazon Affiliate Page. I earn a small commission when you purchase through my links, at no cost to you, so I can keep bringing you more delicious recipes!
- I use this 6 Qt Instant Pot® and it comes with a trivet. I actually used this Steaming Rack to lift the chicken up higher, but it’s not necessary. I just don’t want anyone coming back asking why their trivet looks different than mine.
- If your pressure cooker did not come with a trivet you can purchase this one, it’s the one that I used to make this chicken, or this version with handles.
More Instant Pot Whole Chicken recipes
If you love this recipe, please rate it five stars and help me share on facebook and to help other readers in our community!
Enjoy!!
Instant Pot Faux-tisserie Chicken
Equipment
Ingredients
Whole Rotisserie Style Chicken
- 4.5 pound whole chicken you can go up to 5 pounds
- 2 tablespoons butter olive oil or ghee for Whole30/Paleo
- 1 teaspoon garlic powder
- 1 teaspoon onion powder
- 1 teaspoon chili powder
- 0.5 teaspoon cumin
- 0.5 teaspoon basil
- 0.5 medium onion, cut into quarters
- 5 large cloves fresh garlic peeled, smashed, and left whole
- sea salt & black pepper, to taste
- 1 cup chicken stock broth or water
Pan Gravy
- 4 tablespoons flour cornstarch, arrowroot, 1/2 teaspoon glucamannan (keto)
Instructions
To Make Whole Chicken
- Mix the softened butter and seasonings together in a small bowl.
- Slide your fingers between the skin and chicken breast to create a pocket. You can use gloves or carefully use a large spoon if you like.
- Place a half of the butter mixture under the skin and rub it around to cover as much as you can. Rub the remaining butter all over the chicken.
- Place the onion wedges and garlic cloves inside the chicken. Use butcher’s twine to secure the legs.
- Place the trivet inside the liner of your pressure cooker. Pour in the chickens stock (or liquid of your choice), and place the chicken on top of the trivet. Make sure the lid is in the “Sealing” position, not “Venting”.
- Secure the lid, press the Manual or Pressure Cook button and adjust the time with the + or – buttons to the length of minutes needed*, mine is 27 minutes on High pressure for a 4.5 pound chicken.
- When the timer beeps, allow the pressure to release naturally for 15 minutes. If the lid will not open, quick release the remaining pressure and remove the chicken.
- Carefully remove the chicken from the pressure cooker and place on a foil lined baking sheet and sprinkle with salt and pepper.
- Place under the broiler for 4 to 5 minutes to brown the skin. Remove from oven and allow chicken to rest for 5 to 10 minutes before serving.
To Make Pan Gravy
- Press the cancel button. Lift the liner/pan out of the pressure cooker and pour the chicken stock through a strainer into a measuring cup.
- Add additional stock to equal 2 cups. Place 2 tablespoons of the hot stock and 2 tablespoons of flour or cornstarch(arrowroot starch for Whole30/Paleo) into a small bowl. Whisk to combine.
- Pour the remaining stock back into the liner of the pressure cooker. Press the Saute button. Add the flour/stock mixture into the pan and whisk to combine.
- Heat until mixture starts to thicken. Serve with chicken and Instant Pot Mashed Potatoes.
Notes
- 3 pounds = 18 minutes with high pressure + 15 minutes natural release.
- 3.5 pounds = 21 minutes with high pressure + 15 minutes natural release.
- 4 pounds = 24 minutes with high pressure + 15 minutes natural release.
- 4.5 pounds = 27 minutes with high pressure + 15 minutes natural release.
- 5 pounds = 30 minutes with high pressure + 15 minutes natural release.
- Cooking time does not include the time it takes for the pressure cooker to reach pressure, this will add an additional 15 to 30 minutes.
- Each pressure cooker is different so times may vary depending on brand, temperature of chicken when you begin cooking, even the size of your pressure cooker can make a difference.
- I have included a scaled down Southwest Seasoning recipe, but any seasoning will work, garlic-lemon, paleo powder, etc.
- You do not have to use a trivet, but the bottom of your chicken will be soggy if you don’t.
- If your cooker is not coming to pressure, double to check that the lid is completely secured and it plays that little song when it’s closed.


Wow. Looks easy and delicious! I need to get me an Instant Pot this instant 😉
It was ridiculously easy, Rachel. My Instant Pot has become my favorite kitchen appliance, lol
So…you use 2 tbs of seasoning mix *and* all of the following spiced?
No Maxine, it is 2 Tablespoons of your favorite seasoning OR the spices that I listed which equal 2 Tablespoons. Sorry for the confusion, I will need to adjust the post. Thanks so much for letting me know how confusing I made that. 🙂
Thanks for the clarification! Making it tonight…
The directions don’t seem to jive with the pictures. At what point , do you add all the seasonings and rub them in ? It looks like in the pic you saute the chicken first then add the seasonings but in your directions it seems to read that all seasonings are added prior to sautéing ?
Ooops, thank you for pointing that out Sabrina! You rub the seasonings on the chicken after it has been seared. I will go in and fix that. 🙂
How much time should I add if my chicken in 4lbs? This is my first time using my instantPot or any pressure cooker for that matter ?
Hi Cassie, from what I have been able to find from other people much more knowledgeable than me: 6 minutes per pound + 2 additional minutes. So a 4 pound chicken should take 26 minutes. I have not tried out this theory myself, but everyone else seems to follow that rule. 🙂
Wonderful! Thank you ?
Cassie, my bird was just under four pounds and 25 minutes was waaaaay too long, but you have likely learned that by now. Laura @ hippressurecookingdotcom gives a range of 20-25 minutes up to 4#. Next time I will stop and check internal temp at 20 mins. Also, the SW seasoning is fine, but desperately needs salt. The surface s & p disappears into the bottom of the pot with searing.
When you say “allow the pressure to release naturally for 15 minutes” are you saying not to turn the small steam release valve at the top? Do you mean, leave the pot alone and turn the steam release valve just prior to taking the lid off? Thank you.
Yes Denise, that is exactly what I mean. 🙂
Mine doesn’t come with the trivet insert, what do I do?
Brendah, I would suggest buying a trivet or a steamer basket to fit inside. You will use it with several recipes so it would be well worth it. 🙂
Hi, I love this recipe and am going to try it for supper. I do not have an Instant Pot but rather a pressure cooker that I use on my stove. Any suggestions as to how to convert Instant Pot recipes to my pressure cooker? Can I brown in my cooker? Thanks for any suggestions or ideas.
I am sorry Joyce, I have no idea. I have never used a pressure cooker in my life, so I only know how the Instant Pot works. Here is a link to a website that specializes in all different types of pressure cookers and has tables to convert recipes. I hope it helps. 🙂 https://www.hippressurecooking.com/pressure-cooking-times/
Yes you can saute in your pressure cooker on the stove, just turn the heat up to med-high flame or elec. setting and brown it on all sides…make sure you have rub oil all over you chicken first. Once browned, season well with salt and pepper then add chicken stock. I also add onions, celery and garlic, because I make gravy for mashed potatoes to go with this. Once you have added your stock and veggies, put on your lid, and lock it up. It will take roughly the same amount of time as the instant pot, give or take depending of the size of your pot and the size of your chicken.
Hi Lisa,
After the pot beeps, do you turn it off while waiting those extra 15 minutes, or you let it be on the Keep Warm setting?
Many thanks.
Hi Fiorenza, you can turn it off or push the keep warm button, both will work. 🙂
Iv tried another one of your recipes and I lived it. This one sounds great also, but I have a slow cooker, not an instant pot. Any suggestions on how to do it in a slow cooker?
Thanks
Thank you Lauren! I would follow these instructions, but swap out the seasonings with the Faux-tisserie seasonings. 🙂 https://cookingwithcurls.com/2014/10/15/slow-cooker-lemon-rosemary-chicken/
I just got my instant pot. Looking for a first recipe to try and want to use this one sounds delicious. The total time you listed is 30 minutes. But then you said doesn’t include 30-40 minutes to reach the pressure. So the total time from start to finish is more like an hour? I’m confused because I’ve never used and Instant Pot and need to plan enough time for this to cook. Thanks so much can’t wait to try it 🙂
Yes Debbie, the total time will be at least an hour. There are a lot of variables that affect how long it takes for an Instant Pot to come to pressure, so I can’t include it in the cooking time. If I leave mine out on the counter for an hour before I cook it, but you pull your straight out of the refrigerator, our times will be different. 🙂 Good luck!!
Found this reciepe and just made it. It was perfect, and just what I was looking for!
Thank you!
That makes me so happy to hear Cindy, thank you!!
I tried this recipe tonight. I just bought my instant Pot so this was my first time using it. I had a 6 pound chicken. I used the spice recipe you gave. I saute and tried to get it to brown but the skin just stuck to the bottom of the pot. I was not detoured. lol The cook time I used was 25 min. and it was completely done. The onions went well and helped give it some flavor. mine turned out looking like a wet steamed bird. It fell apart and tasted good after I added salt and pepper . It was bland to me, I guess I expected a wow flavor. I thought the flavor would be saturated through the bird. My husband still had seconds and it was tasty.
So I just tried this recipe and the chicken was not cooked all the way through and the skin was not crispy at all. What did I do wrong?
Christine, the skin will not be as crispy as being roasted in an oven. What size was your chicken? If it was significantly larger, it will take longer to cook. If it was the same size, I have no idea, sorry.
I made this tonight. My husband says it is the best chicken he has ever eaten. That is something! We are in our mid fifties so we’ve eaten a lot of chicken over the years. He is very picky & idolizes his mom’s cooking! Looks like I’ve finally bested her cooking–at least in HIS mind! Woohoo!
Woohoo,that is awesome Mary! I am so glad you both enjoyed it. 🙂
Hi Lisa, I have the 8 quart Instant Pot. Do I need to add more than just one cup of broth to the bottom?
I am not sure Mimi, it should say how much liquid to use in the instruction manual. 🙂
Was your chicken thawed? I’ve never tried to cook a whole chicken before. I wanted to try this recipe. I’m trying to come up with as many recipes as possible before school starts back.
Yes it was Mandy. A frozen whole chicken may be hard to get into the pot since it doesn’t bend, but I have not tried it. 🙂
I’m new to InstantPot. When I set the timer for 25 min, does the timer start once the post has reached pressure or do I need to set the time for 45 – 55 min? Thank you!
Once you set the timer for 25 minutes it will beep and I believe the screen shows ON while it is building pressure. The Instant Pot will start the timer once it reaches pressure. Once the timer is finished, it will start a new count for holding/keeping it warm until you press the Cancel button. So if you need natural pressure release, it will count it for you. 🙂
I am glad you explained the timer thing…I thought maybe I had figured it out. Set timer on stove , just in case This recipe is the first recipe I tried ! 🙂
I put the chicken in the instant pot. Hit manual and hit timer. It would only let me increase the time by 5 minute increments. It started counting down but never came to pressure. After 45 minutes there is still raw chicken in there. When I hit poultry it is now acting like it is starting to come to pressure. What’s wrong with the manual setting on my IP?
I have not run across that issue Jillian, it would be best to contact support and open a ticket. If there is an issue with your Instant Pot they will tell you exactly what to do to fix it. http://instantpot.com/support/
Hi there! Tried this recipe last night in my 8qt instant pot, and while it was tasty, the skin wasn’t crispy at all. Where did i go wrong?
The skin will not be crispy like traditional rotisserie chicken because it is steamed, not baked in a dry oven. You can always put put the cooked chicken in a 425 degree oven for about 15 minutes to get it crispy!
Does the basil go in the seasoning mix
The recipe for southwest seasoning doesn’t list it
Yes Penny, the basil goes in the seasoning mix. I rewrote the recipe this morning to try and make it more clear, so hopefully that will help. 🙂
Help me. The smallest chicken I could fiind was a 5 pound chicken. How would this change cooking time??
I would cook it for 32 minutes, assuming that you can fit it inside the pot. You may also want to sear it in a separate pan to make it easier to turn. 🙂
Help please! The smallest I could find was a 5.34 lh chicken. How long would you cook it for?? And my instapot is 10 quart so would I use 2 cups stock??
Jamie, cook for 6 minutes per pound (30 minutes) and allow the pressure to release naturally. Check your owner’s manual to see how much liquid to add. I didn’t know they made a 10 quart! 🙂
I know this is an older comment I’m replying to, but in case someone else has the same question… I have the 6 quart duo Instant Pot and I just cooked an almost 6 pound chicken in mine and it fit just fine in there and come out fork tender. I had no trouble searing it and turning it. I have done this several times now with chickens ranging from 4 1/2 pounds to almost 6 pounds without issue. My rule of thumb with whole chickens is 6 minutes per pound with a natural release. Works every time and the results are yummy!
Thank you, Ella! I haven’t tried this recipe yet, but have seen several other ones that use up to 6 pound chickens in a 6 qt.
I just ordered my insta-pot and I’m stockpiling on recipes. Can’t wait to make this one. My question is why do you mention to throw away the onions & garlic? Is it because it was cooked in the cavity of the chicken? My family loves cooked garlic & onions
I throw them away because I didn’t have a use for them, Chanie. 🙂
This was my first attempt at making a rotisserie chicken in my Instant Pot. AMAZING! I normally pick up a rotisserie chicken from Whole Foods, but man, this one I made was WAY more moist and delish. Put a ton of spices on it…chili powder, cumin, 12 salute seasoning from Trader Joes, salt and pepper. I had a 5 1/2 pound chicken and cooked it for 35 minutes, then let it sit for another 20 minutes and simply delish! Will be my go-to recipe from now on. Thanks so much for sharing!
Making it now and it looks and smells like it’s going to be tasty. Thank you! I use kosher chicken so it doesn’t need any added salt.
I have a 6 qt IP. I don’t know how anyone is able to even fit a small chicken in the IP. I hadn’t a 4lb chicken which wound not fit flat and it would’ve too tall to fit in the pot and put a cover in it. What am I missing here that others have even put a 6 lb chicken in an IP
You would need to use an 8 quart to fit a 6 pound chicken, nothing over 5 pounds will fit in a 6 quart. My chicken was just under 3 pounds, Marie.
Others on this reply have said they have cooked bigger than 3 lbs I their pots and I thought they were also 6 qts. Even a 3 lb chicken looks too big to fit to me.
If go to deli area they have smaller chicken they use for their roasted chickens ask.
I have the 6 quart duo and I cook whole chickens in there up to almost six pounds without any issues. I have done this many times now with no problems and delicious results. If I can do it I don’t know why anyone else wouldn’t be able to.
This was great but I do have a question as I am new to using the instant pot… Any tips for how you flipped the bird when doing the searing? Once it was down in there seating and the pot was hot with hot oil… it was VERY difficult to flip over an oiled chicken without burning myself. Luckily my husband walked in right as I was attempting and helped. How do you do it?
Flipping the chicken over is the hardest part, Jen. I start with tongs, one inside one on the outside. If that doesn’t work, I just grab the legs, lift it up and flip it over, LOL
Hi Lisa!
New to the IP world, this recipe sounds awesome, want to try it soon; That said, I have an IP Mini, any variations on time? Assuming I can find a small bird.
Thanks in advance!!!
Hi Cynthia, I do not know anything at all about the Mini. I would check the owner’s manual and see if they have a chart for cooking times. Sorry. 🙁
Cornish hen would probably work great in a small ip
This looks great but I’ve read a lot of comments about dry and over-cooked chicken when done this way. Contrary to your recipe notes, we made a similar recipe without the trivit and reduced the broth to 2/3 cup. The bird was juicy and perfect, with no sogginess. Also, after making a few different whole chicken recipes in he IP, we’ve found that a pressure cooking time of 8 min/lb followed by a NR of 15-20 mintes gives a consistently juicy and tender chicken. Thanks for your wonderful post and great photos, all very nicely done!
Oh sweet baby James, that was one good chicken. I pulled the bone right out of the drumstick, trying to carve it. My husband, after he ate, said, “You need to use that little robot to cook all your chickens from now on.”
Hahaha, I love it Toni! I’m so glad your husband approves of your robot cooked chicken. 😉
Hey there! Loved this. One point of clarification: it’s listed at 91 calories per serving (love that there are nutrition facts–thanks!). How many ounces do you mean a serving of this to be? One? Four? Thank you!
The total serving size was a guess and the nutrition calculator broke it down from there, Celia. It’s difficult to determine the actual amount of meat on the chicken without weighing it, which I did not think to do. A 2 1/2 pound chicken “could” be half skin and bones, which would leave 1 1/4 pounds of chicken meat divided between 4 people would be a little over a 1/4 pound each…or about 5 ounces. 🙂
Hello Lisa! This is a wonderful recipe! I had a little question: I tend to go for white wine when dealing with a whole chicken – would it be okay, in your opinion, to opt for wine over the broth in the bottom of the IP? Or half wine, half broth? Wine just tends to deliver SUCH lovely flavor with poultry.
Thank you!
That sounds like an awesome idea Alyssum! I use beer and wine in mine all the time. 🙂
Curious how you came to 91 calories per serving but only 1 gram of protein.
I use an app that generates the nutritional data, something must have not have calculated correctly, LOL
Just made this tonight. Was so good. Planning on use leftover meat and broth to make chicken noodle soup.
So glad I found this recipe. We had traded duck eggs with our neighbor for a freshly slaughtered chicken. Wasn’t sure what I was going to do with it and this was perfect.
Nutrition facts seem off (1 gram of protein?) especially since the recipe includes a chicken.
I’m still trying it though ?
I fixed it Allen. Apparently I cannot use 2 1/2 to 3 as a value in the nutritional calculator, it was calculating the chicken as 0 pounds. 🙁
We had the faux-tisserie chicken cooked in my Instant Pot. It was delicious! This is a wonderful way to
“roast” a whole chicken. We really enjoyed the South-
Western rub. I also made a gravy and it too was very tasty.
This is now my go to recipe for roasted chicken
I’ve now subscribed to your site.
Thanjd
Thank you so much Allyson, I am so glad you enjoyed it!!
How do you keep the skin from getting stuck on the bottom of the Instant Pot when searing both sides for 4 minutes? I used a full tablespoon of olive oil. Thanks for your help!
More oil would probably help, Matt. If you have a newer instant pot or an 8 quart, I would try to pressure the Saute button a couple of times to drop it down to a lower setting so it doesn’t get as hot. I have not tried this myself, bu I have heard that it is possible. I hope that helps!
When you mention 25 minutes, should it be on high or low pressure cooker? The recipe doesn’t specify this.
Hi Madina, it is High Pressure.
Have made this a couple times wth great success. Just wondering what you use the liquid for afterwards besides gravy or chicken broth?
I am so happy to hear that, Nancy! I have honestly only used the liquid for gravy, sorry I wish I had a really creative answer for you! 🙂
Is it okay if the chicken is not completely thawed before cooking?
Yes that will be fine, it will just take longer to pressurize. 🙂
If cooking from frozen how much time would you suggest adding?
The cooking time remains the same Sarah, but it will take longer for the Instant Pot to come up to pressure and begin cooking.
I have a “quick pot” it did not come with a trivit, can I still use this recipe ?
I used a 5.5 lb chicken and I cooked it at 6 min per pound. It was not quite done. I put it in the oven for 30 minutes at 350. The skin was crisp and the meat tender! I used pub chicken seasoning from Aldi’s to season the chicken and the gravy was delicious!
This was the best tastiest chicken I ever experienced…just got my insta-pot for Xmas & it’s great 👍!
Quick & convenient folks !!
Can the chicken be stuffed? Will the stuffing cook the way it should?
I appreciate this recipe—I had all the ingredients on hand and it was easy to make. I cooked a 4.4# chicken. Having read other reviews, I armed myself with two large cooking forks to turn/remove the chicken and had no problems. One oops I had was that I placed the chicken on the trivet upside down! When I went to remove the chicken it fell apart because it was so tender. No big deal. Next time I will cook it less than 25 minutes. Definitely a great recipe!
I love this! Chicken wings are my favorite cut of chicken, chicken wings are so much flavorful. But my husband is a big red meat eater so I am always looking for tasty new ideas for chicken and fish to get him to cross over to my side. I can’t wait to try those recipes.
Mercer Lynda